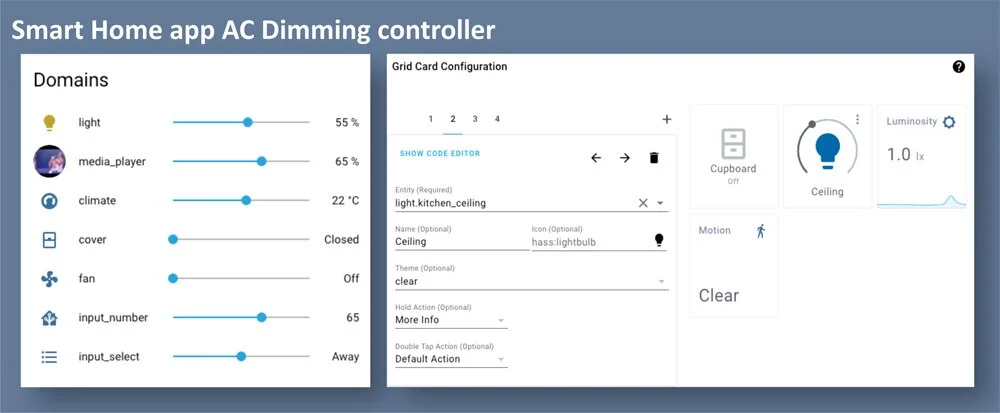
This project shows how to use MQTT communication protocol with the ESP32 to publish messages and subscribe to topics from MQTT broker under servers like Home Assistant, Node RED, Amazon AWS, and openHAB. As an example, we’ll control the dimmer. The server can be either local or on the cloud.
The ESP32 we’ll be programmed using Arduino IDE. The PubSubClient library provides a client for doing simple publish/subscribe messaging with a server that supports MQTT.
You can upload the following code to your ESP32. The code is commented on where you need to make changes.
You need to edit the code with your own SSID, password and MQTT broker IP address.
- #include <RBDdimmer.h>
- #define outputPin 4
- #define zerocross 5
- dimmerLamp dimmer(outputPin, zerocross); //initialase port for dimmer for ESP8266, ESP32, Arduino due boards
- #include <WiFi.h> // For ESP8266 #include <ESP8266WiFi.h>
- #include <PubSubClient.h>
- // WiFi Network Credentials
- const char *ssid = "REPLACE_WITH_YOUR_SSID"; // name of your WiFi network
- const char *password = "REPLACE_WITH_YOUR_PASSWORD"; // password of the WiFi network
- // MQTT server Credentials.
- // const char *HA_USER = "_____";
- // const char *HA_PASS = "_____";
- IPAddress broker(XXX,XXX,XXX,XXX); // IP address of your MQTT broker eg.
- const char *ID = "Example_Dimmer"; // Name of our device, must be unique!!!
- char *STATE_TOPIC = "dimmer/power/state"; // Topic to publish the light state to
- char msg[50];
- WiFiClient wclient;
- PubSubClient client(wclient); // Setup MQTT client
- // Handle incomming messages from the broker
- void callback(char* topic, byte* payload, unsigned int length) {
- String response;
- int power_L;
- for (int i = 0; i < length; i++) {
- response += (char)payload[i];
- }
- Serial.print("Message arrived [");
- Serial.print(topic);
- Serial.print("] ");
- Serial.println(response);
- power_L=response.toInt();
- dimmer.setPower(power_L);
- delay(50);
- snprintf (msg, 50, "%ld", dimmer.getPower());
- client.publish(STATE_TOPIC, msg);
- Serial.print("State ");
- Serial.println(msg);
- }
- // Connect to WiFi network
- void setup_wifi() {
- Serial.print("\nConnecting to ");
- Serial.println(ssid);
- WiFi.mode(WIFI_STA);
- WiFi.begin(ssid, password);
- while (WiFi.status() != WL_CONNECTED) { // Wait for connection
- delay(500);
- Serial.print(".");
- }
- Serial.println();
- Serial.println("WiFi connected");
- Serial.print("IP address: ");
- Serial.println(WiFi.localIP());
- }
- // Reconnect to client
- void reconnect() {
- // Loop until we're reconnected
- while (!client.connected()) {
- Serial.print("Attempting MQTT connection...");
- // Attempt to connect
- if(client.connect(ID,HA_USER,HA_PASS)) {
- client.subscribe(TOPIC);
- Serial.println("connected");
- Serial.print("Subcribed to: ");
- Serial.println(TOPIC);
- Serial.println('\n');
- } else {
- Serial.println(" try again in 5 seconds");
- // Wait 5 seconds before retrying
- delay(5000);
- }
- }
- }
- void setup() {
- dimmer.begin(NORMAL_MODE, OND); //Initialize the dimmer
- Serial.begin(115200); // Start serial communication at 115200 baud
- delay(100);
- setup_wifi(); // Connect to network
- client.setServer(broker, 1883);
- client.setCallback(callback);// Initialize the callback routine
- }
- void loop() {
- if (!client.connected()) // Reconnect if connection is lost
- {
- reconnect();
- }
- client.loop();
- }
The MQTT broker publishes the dimmer value (0~100) on the dimmer/power/state topic. The ESP32 is subscribed to those topics. So, it ESP32 receives the dimming value (0~100).
For use the dimmer 2-4 or more lines need to add the topics, and change callback function for read topics:
- char *STATE_TOPIC1 = "dimmer/power1/state";
- char *STATE_TOPIC2 = "dimmer/power2/state";
- char *STATE_TOPIC3 = "dimmer/power3/state";
- char *STATE_TOPIC4 = "dimmer/power4/state";